Here’s a step-by-step guide on how to install a Black Boar implement the right way:
1. Gather Your Tools and Equipment
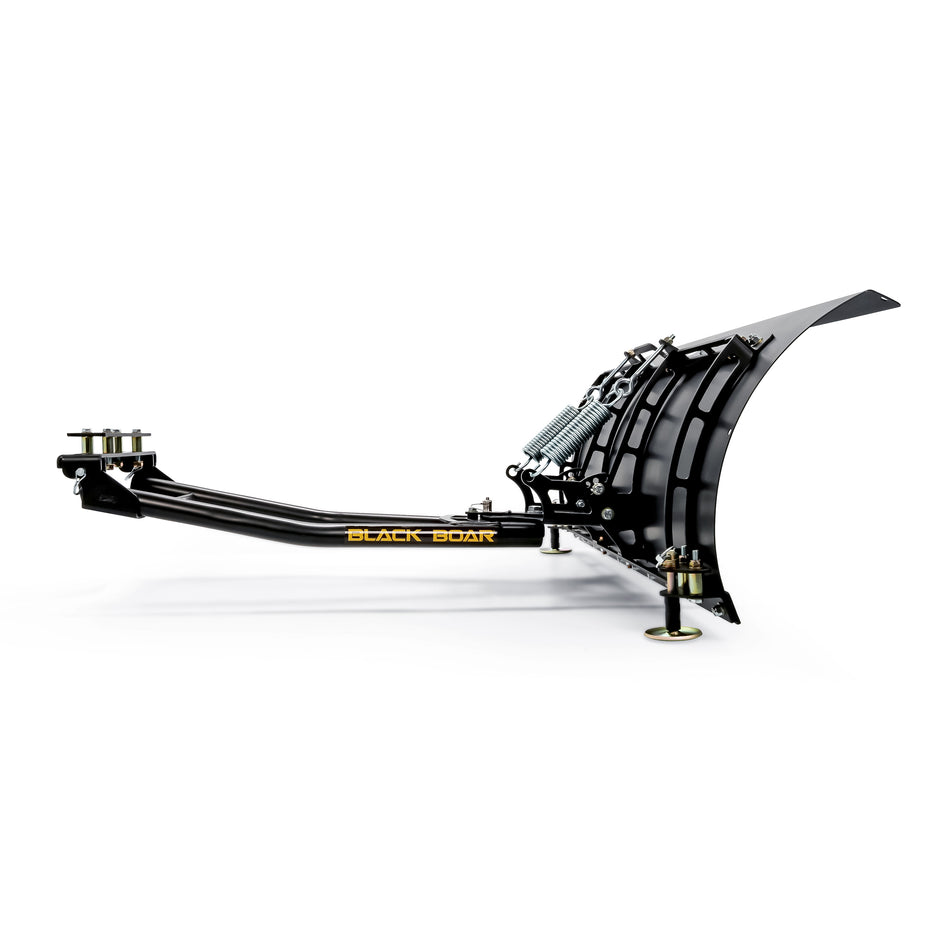
- Your Black Boar implement (e.g., plow, disc harrow, rake)
- ATV/UTV or tractor (depending on the attachment)
- Wrenches or ratchet set (for bolts)
- Hitch pin and clip (usually provided with the implement)
- Gloves and safety gear (eye protection and gloves recommended)
2. Ensure Your ATV/UTV Is Ready
Most Black Boar implements are designed to attach to an ATV or UTV using a universal hitch system.
To make sure your vehicle is ready:
- Check the hitch receiver: Ensure it’s compatible with the Black Boar attachment. The 2-inch hitch receiver is standard for most Black Boar products.
- Clean the receiver: Remove any dirt, rust, or debris from the receiver to ensure a snug fit.
- Check your ATV/UTV's towing capacity: Some implements, like a disc harrow, can put more strain on the vehicle. Make sure your ATV/UTV is up to the task.
3. Assemble the Implement
Depending on the Black Boar implement, some assembly may be required.
Here are a few tips:
- Follow the instructions closely: Black Boar provides detailed assembly instructions, often with visual guides. Ensure you follow them step by step.
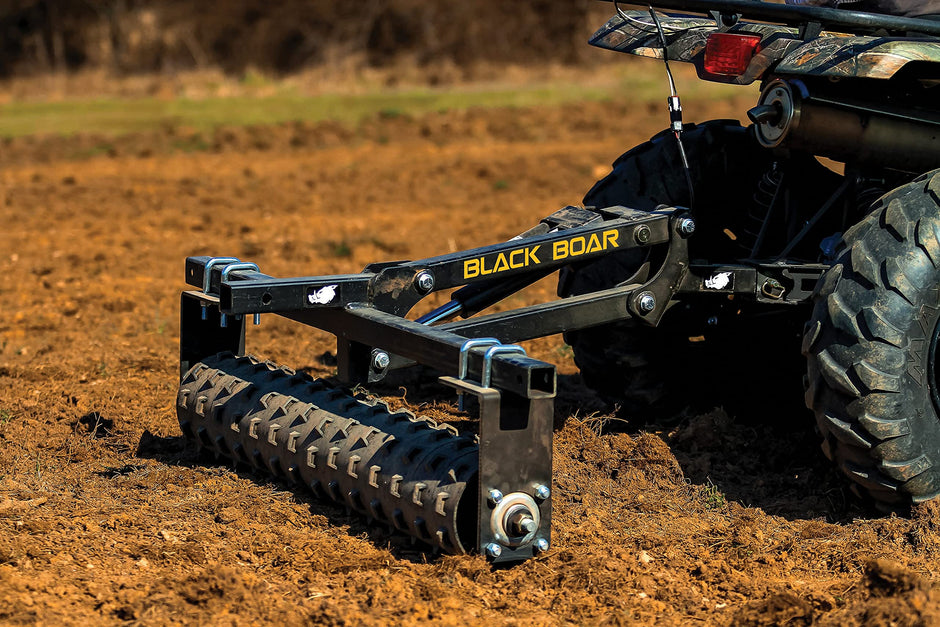
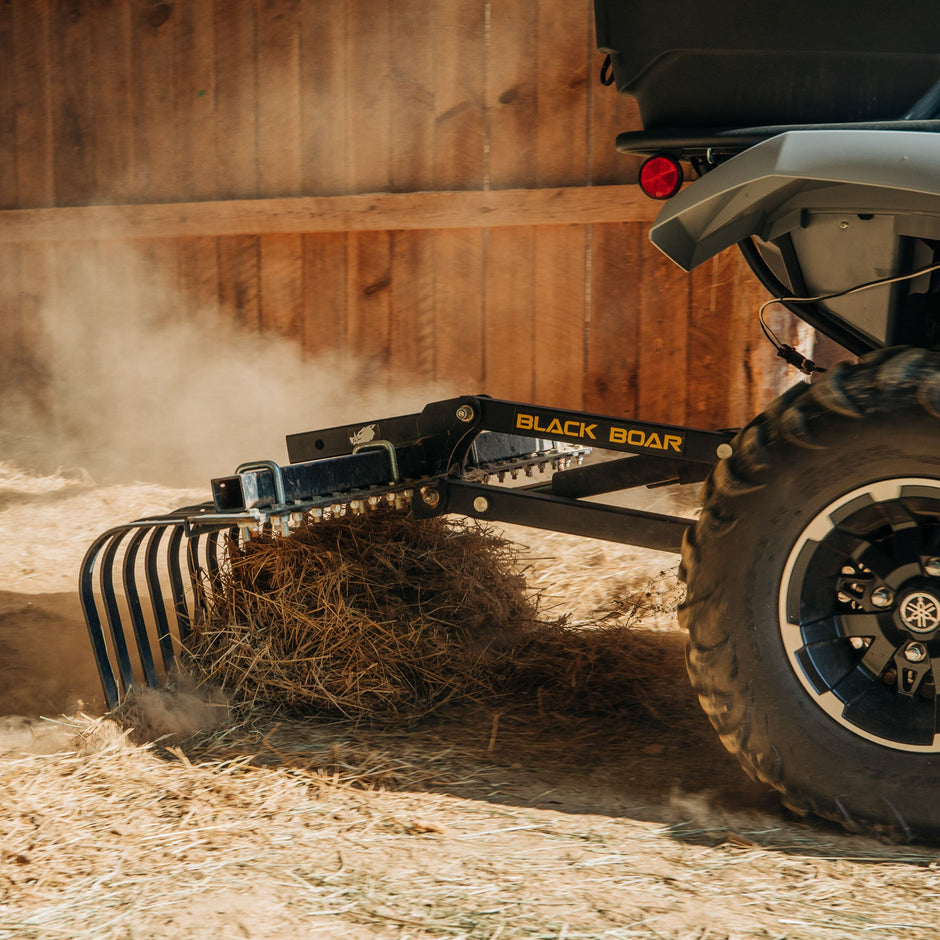
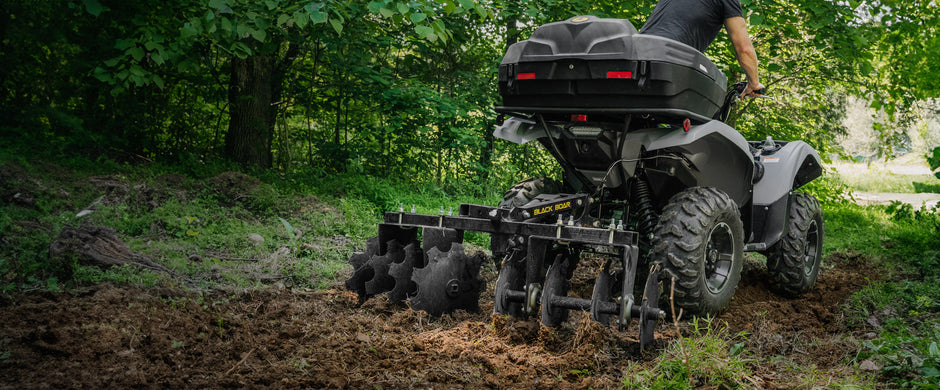
- Attach any blades or discs: If you’re installing a plow or disc harrow, ensure the blades are securely fastened and oriented correctly.
- Tighten bolts properly: Use a torque wrench where applicable, and ensure all bolts and fasteners are tightened to the recommended torque levels.
4. Attach the Implement to Your ATV/UTV
Once the implement is assembled, you’re ready to attach it to your vehicle:
- Position the implement: Align the hitch connection of the Black Boar implement with your ATV/UTV’s hitch receiver.
- Insert the hitch pin: Slide the hitch pin through the aligned holes and secure it with the provided clip. Make sure the pin is fully seated and locked in place to prevent the implement from detaching while in use.
- Check for levelness: Adjust the height or angle of the implement if needed to ensure it’s level with the ground. Some Black Boar attachments come with an adjustable arm for fine-tuning.
5. Test the Implement
Before heading into heavy-duty work, test the implement:
- Perform a quick drive test: Slowly drive forward and back to ensure the implement is securely attached and responds well to movement.
- Test different angles and positions: If your Black Boar implement has adjustable settings (like plow angle or depth for a disc harrow), take the time to test them. This ensures you have the correct setup for the task at hand.
6. Maintain the Implement
To get the most out of your Black Boar implement:
- Regularly check fasteners: After each use, check that all bolts, pins, and connections remain secure.
- Clean after use: Dirt, mud, and debris can accumulate on the implement. Hose it down after use and inspect for any wear or damage.
- Lubricate moving parts: Periodically lubricate any moving parts or joints to ensure smooth operation.
Pro Tips for Installing and Using Black Boar Implements:
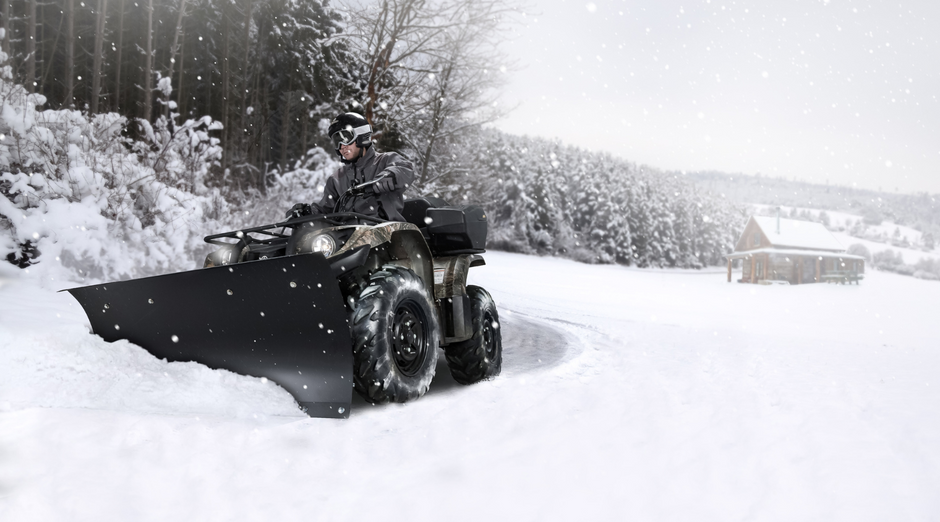
- Match the implement to the task: Black Boar offers different types of implements, each suited for specific tasks. Whether it’s a plow for snow, a rake for leveling, or a disc harrow for tilling, choose the right tool for the job.
- Consider ground conditions: The performance of your implement depends on the condition of your land. For example, wet or rocky terrain can affect plowing and discing. Test a small area first to gauge how well the implement works.
- Use ballast when needed: For implements that require extra ground penetration, like a disc harrow, adding weight or using a ballast can help improve performance.
Installing a Black Boar implement is straightforward with the right tools and approach. By following these steps, you can ensure a secure, effective installation that allows you to tackle your land management tasks efficiently. Proper maintenance and understanding of the implement’s features will ensure it serves you well for years to come.
Now you’re ready to tackle any job with your Black Boar implement—whether you’re plowing fields, leveling ground, or prepping your land!